
Configuring Exchange Sync
Configuring Bipsync to sync contacts and calendar events from Microsoft Exchange
To allow Bipsync to sync contacts, appointments and meetings from Exchange, we first need to set up an Exchange Server within the Bipsync Setup app.
Configuration PrerequisitesThe following process assumes a “sync user” has been created in Exchange which is able to access its personal calendar and/or read from one or more shared contact/appointment folders. We will be authenticating as this user.
Log in to the Setup app and select the "Integrations" menu option, then "Microsoft Exchange":

The root Exchange settings view.
Next select the New Server button in the top right of the window.

Click on this button to create a new Exchange Server configuration.
Enter the connection details for the Exchange server. The username and password are the credentials for the "sync user" mentioned earlier.
Note: If using Office365, the server URI will be: https://outlook.office365.com/ews/exchange.asmx

The completed server configuration form.
Apply the configuration using the save button in the top right corner.
To test that the configuration is valid, click the "Test Connection" button to validate that Bipsync is able to communicate with Exchange.

Once this has been done, we can move on to the sync specifics in the Data Sync section of the page.
Enabling Exchange Sync
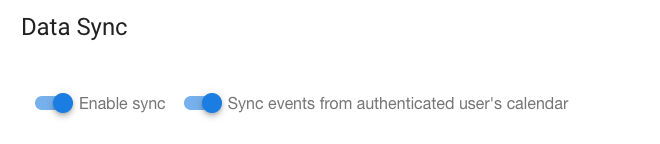
To enable syncing, simply toggle on the "Enable sync" option and save.

Toggle this on to enable syncing.
Syncing events from the Sync User's calendar
To sync events, such as meetings, that have been added to the calendar of the Sync User, simply toggle on the "Sync events from authenticated user's calendar" option, and save.
To add events to this calendar, invite the sync user (i.e. the user whose credentials we are using to authenticate) to any meetings that you want synced to Bipsync.

Invite the sync user (here named "Data User") to any meetings that you want synced to Bipsync.
Syncing data from shared folders
To sync shared contacts and events, first click the Sync Folders button to begin a sync of the folder hierarchy. Be patient because this could take a minute or two to complete.

Click the Sync Folders button to sync Exchange's folder hierarchy.
After the process has completed, a folder tree should be visible, showing Exchange's public folder hierarchy. Check the folders you want to be synced, then save.

The checked folders will be synced.
Choosing a default author
Next, select a default author. The default author is used when we're unable to assign a user to an object that's synced from Exchange, e.g. when no user in Bipsync has the email associated to an Exchange data object like a calendar event.

Select an author from this field.

This user will own any unassignable data.
A common option is to create a user in Bipsync that's the designated "Exchange user". Alternatively, you could choose a member of your team.
Once you've selected a user, save the form.
Externally Arranged Meetings
When Bipsync has been configured to sync meetings from the sync user's personal calendar, it's important to note that Exchange treats meeting invites differently depending on how the sync user was invited to those meetings.
Exchange differentiates between invites from people within the same organisation as the sync user – i.e. their email addresses share the same domain – and from people that are external to the firm.
In the case where they're in the same organisation, meetings will be immediately added to the sync user's calendar. This means that Bipsync is able to sync them with no other configuration necessary.
In the case where they're external, before these meetings can be synced to Bipsync we must enable a setting in Outlook/Exchange that automatically processes meeting requests from external senders. A screenshot of the setting within OWA is show below; depending on the version of Exchange/Outlook that's being used this may be controlled from other places.

Tick the "Automatically process requests and responses from external senders" to ensure Bipsync can sync meetings arranged by third parties.
Testing the Sync Process
To test whether Bipsync is able to find the data that you wish to sync from Exchange, click the "Test Sync Folder Items".

This will simulate what will happen if Bipsync were to sync the the authenticated users' calendar, and any public folders that have been selected. If you have data in these places, you should eventually see a popup which confirms that we found data to sync. If this is the case, everything is set up correctly and data from exchange should soon begin to appear in Bipsync.

Updated 11 months ago