
Remote Working with Bipsync - Key Features
The following how-to guide covers seven key Bipsync features and use-cases, in detail, to help streamline your personal organization and consumption in Bipsync, as well as enhance communication and collaboration across your team and firm, in support of your remote working strategy.
You can navigate the feature guides via the the table of contents links to the right, and please contact our Customer Success team at [email protected] if you’d like additional detail or support.
Subscriptions and Notifications
Set-up daily digests and real time updates for your priority Bipsync content and ideas, so you don't miss a beat.
You can subscribe to any object in Bipsync - notes, authors, contacts, user groups, companies, topics or any tag - to receive notifications when any new content is added, updated or shared.
Set up your subscriptions
1.) First, click on the record of an item in the left hand nav panel, or select a note from the middle pane. In this example we've selected the 'Industrials usergroup' so we can get notified of new notes or files that have been published by members of this group.
2.) At the top of the dashboard on the gray toolbar, you will see a crossed-out bell icon that says 'Unsubscribed'.
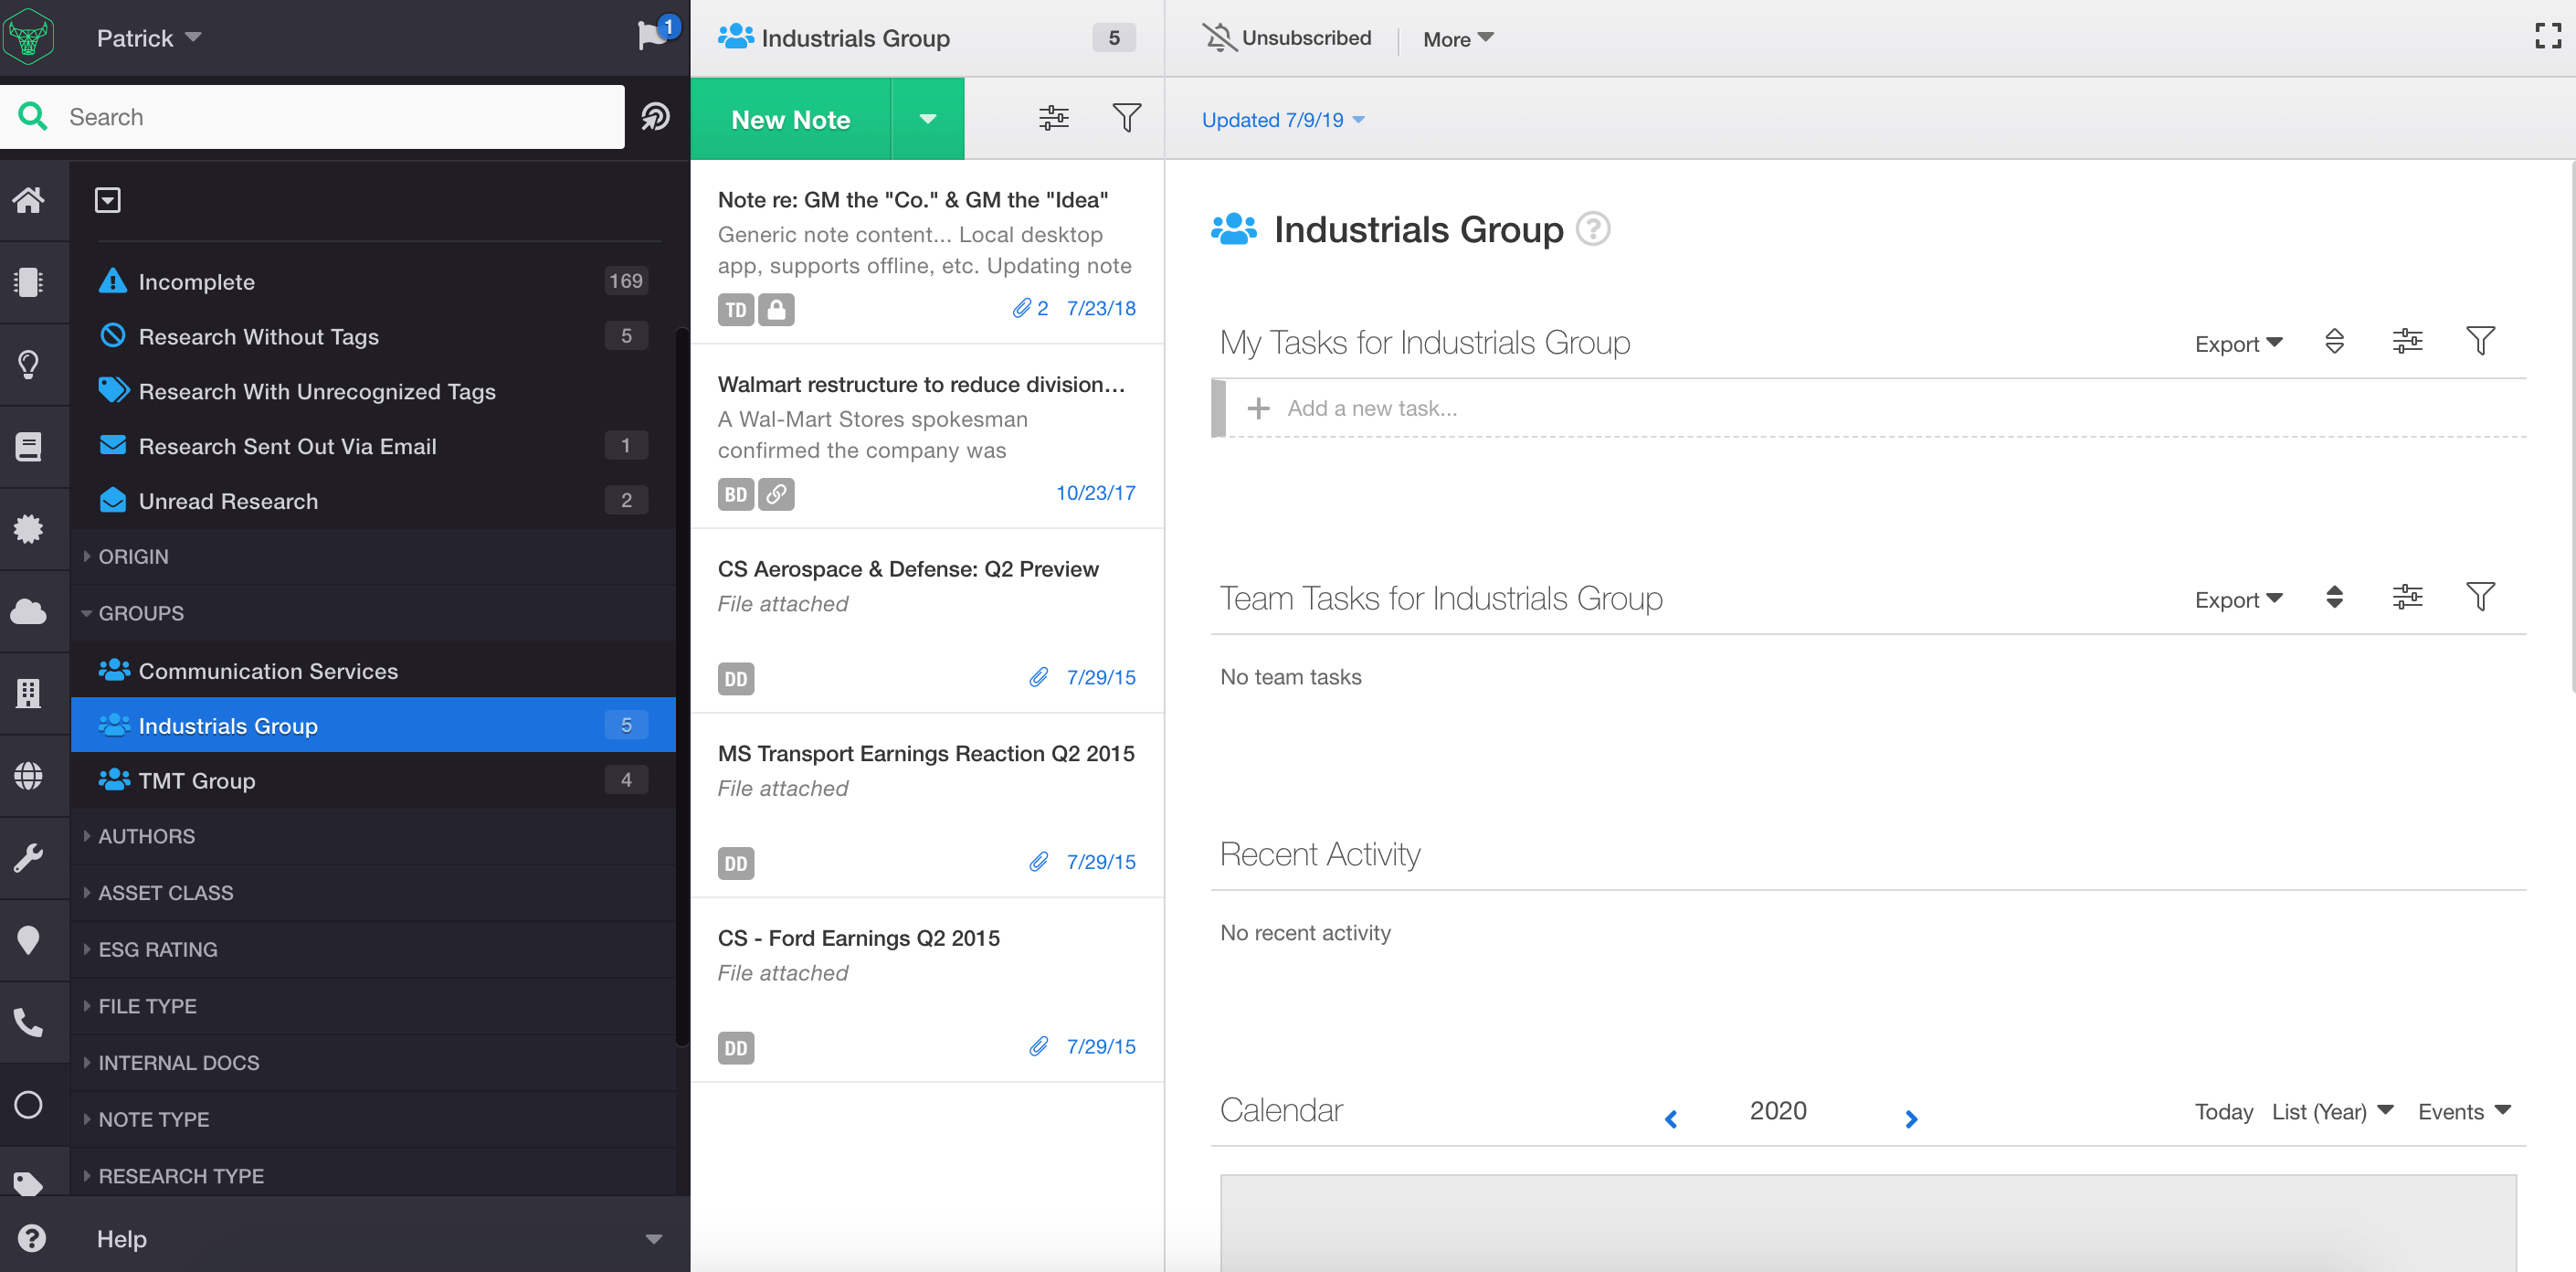
3.) To subscribe, simply select the bell icon to toggle it on. The green check mark means you have subscribed. This subscription icon toggle is available on individual notes, contacts, authors, and tags too.

Choose your subscription notifications
1.) To adjust how you receive your subscription notifications, select the Bipsync bull icon in the top left of your screen and go to 'Settings'.

2.) Once in the settings menu, select the 'Notifications' section to fine tune the frequency and delivery method of your subscriptions
- You can select in-app and/or email notifications, as well as frequency.
- The 'Email frequency' setting for example, allows you to toggle between real-time alerts or a daily-digest of content at a time of your choosing.

Manage and edit your subscriptions anytime
1.) Select 'Subscriptions' in the Settings menu to see the list of all your current subscriptions.
2.) From here you can toggle off any subscriptions you no longer find relevant.

Comments, @mentions and collaboration
Use comments to communicate in real-time with, or notify, your colleagues on relevant content or questions during calls, virtual events, or when reviewing notes.
Comments are available on every note that is shared with you, even when the note is locked by the author.
General Comments and @Mentions
1.) In the note editor, click the bubble icon to add a comment. The comment bar will appear at the base of your page.

2.) Use the @mention feature to notify a specific colleague or a Bipsync user group.
We recommend selecting 'real-time' notifications for @mentions in your Notification preferences in Settings to ensure colleagues are collaborating in real-time when working remotely.

In-line Comments and In-app Conversations
1.) Use in-line comments to highlight specific sections of the note body for your commentary to see which users have commented on which parts of the note, and conversations/ responses within.
2.) To do this, highlight a specific section of text in the note body and click the comment icon, to pop out the comment bar on the right of your note editor.


3.) Inline comments are given a unique color per user, to make it easier to see which users have commented on which parts of the note

Split Preview Files & Maximize Screens
If you're working with limited screen real-estate while at your home office set-up, use Bipsync’s file preview and maximize feature to focus-in on what's important.
1.) To utilize the maximize screen function, first select a note in the middle pane.

2.) You can use the square maximize button in the top right of the grey toolbar to expand the note to full screen. You can use this square maximize button on any view for the right panel (dashboards, grids, charts, files, to achieve full-screen views).
3.) To preview attachments, once the note is maximized, select the attachment and click on the 'Split Preview' action in the drop down. You then have the option of opening the attachment along-side (vertical) or underneath (horizontal) your note content

4.) The attachment will then appear in the same window so you can take advantage of viewing and editing both the note and the attachment without the added hassle of having to toggle back and forth.

Collate Multiple Notes into PDF
Collate all research on a particular topic or tag or select a more specific set of notes, and convert into a single PDF ready for print, easy review, mark-up or sharing.
1.) To create a single PDF of multiple notes, select a note in the middle pane.
2.) Then, while holding either the Shift or Command key, select any additional notes you want to include in the export.

3.) When the right hand pane updates to show a window with 'Use the menu above to edit the selected documents', select the More button on the gray toolbar and then 'Save as PDF'.

4.) A notification will then appear on the flag icon indicating that the PDF is ready to be downloaded.

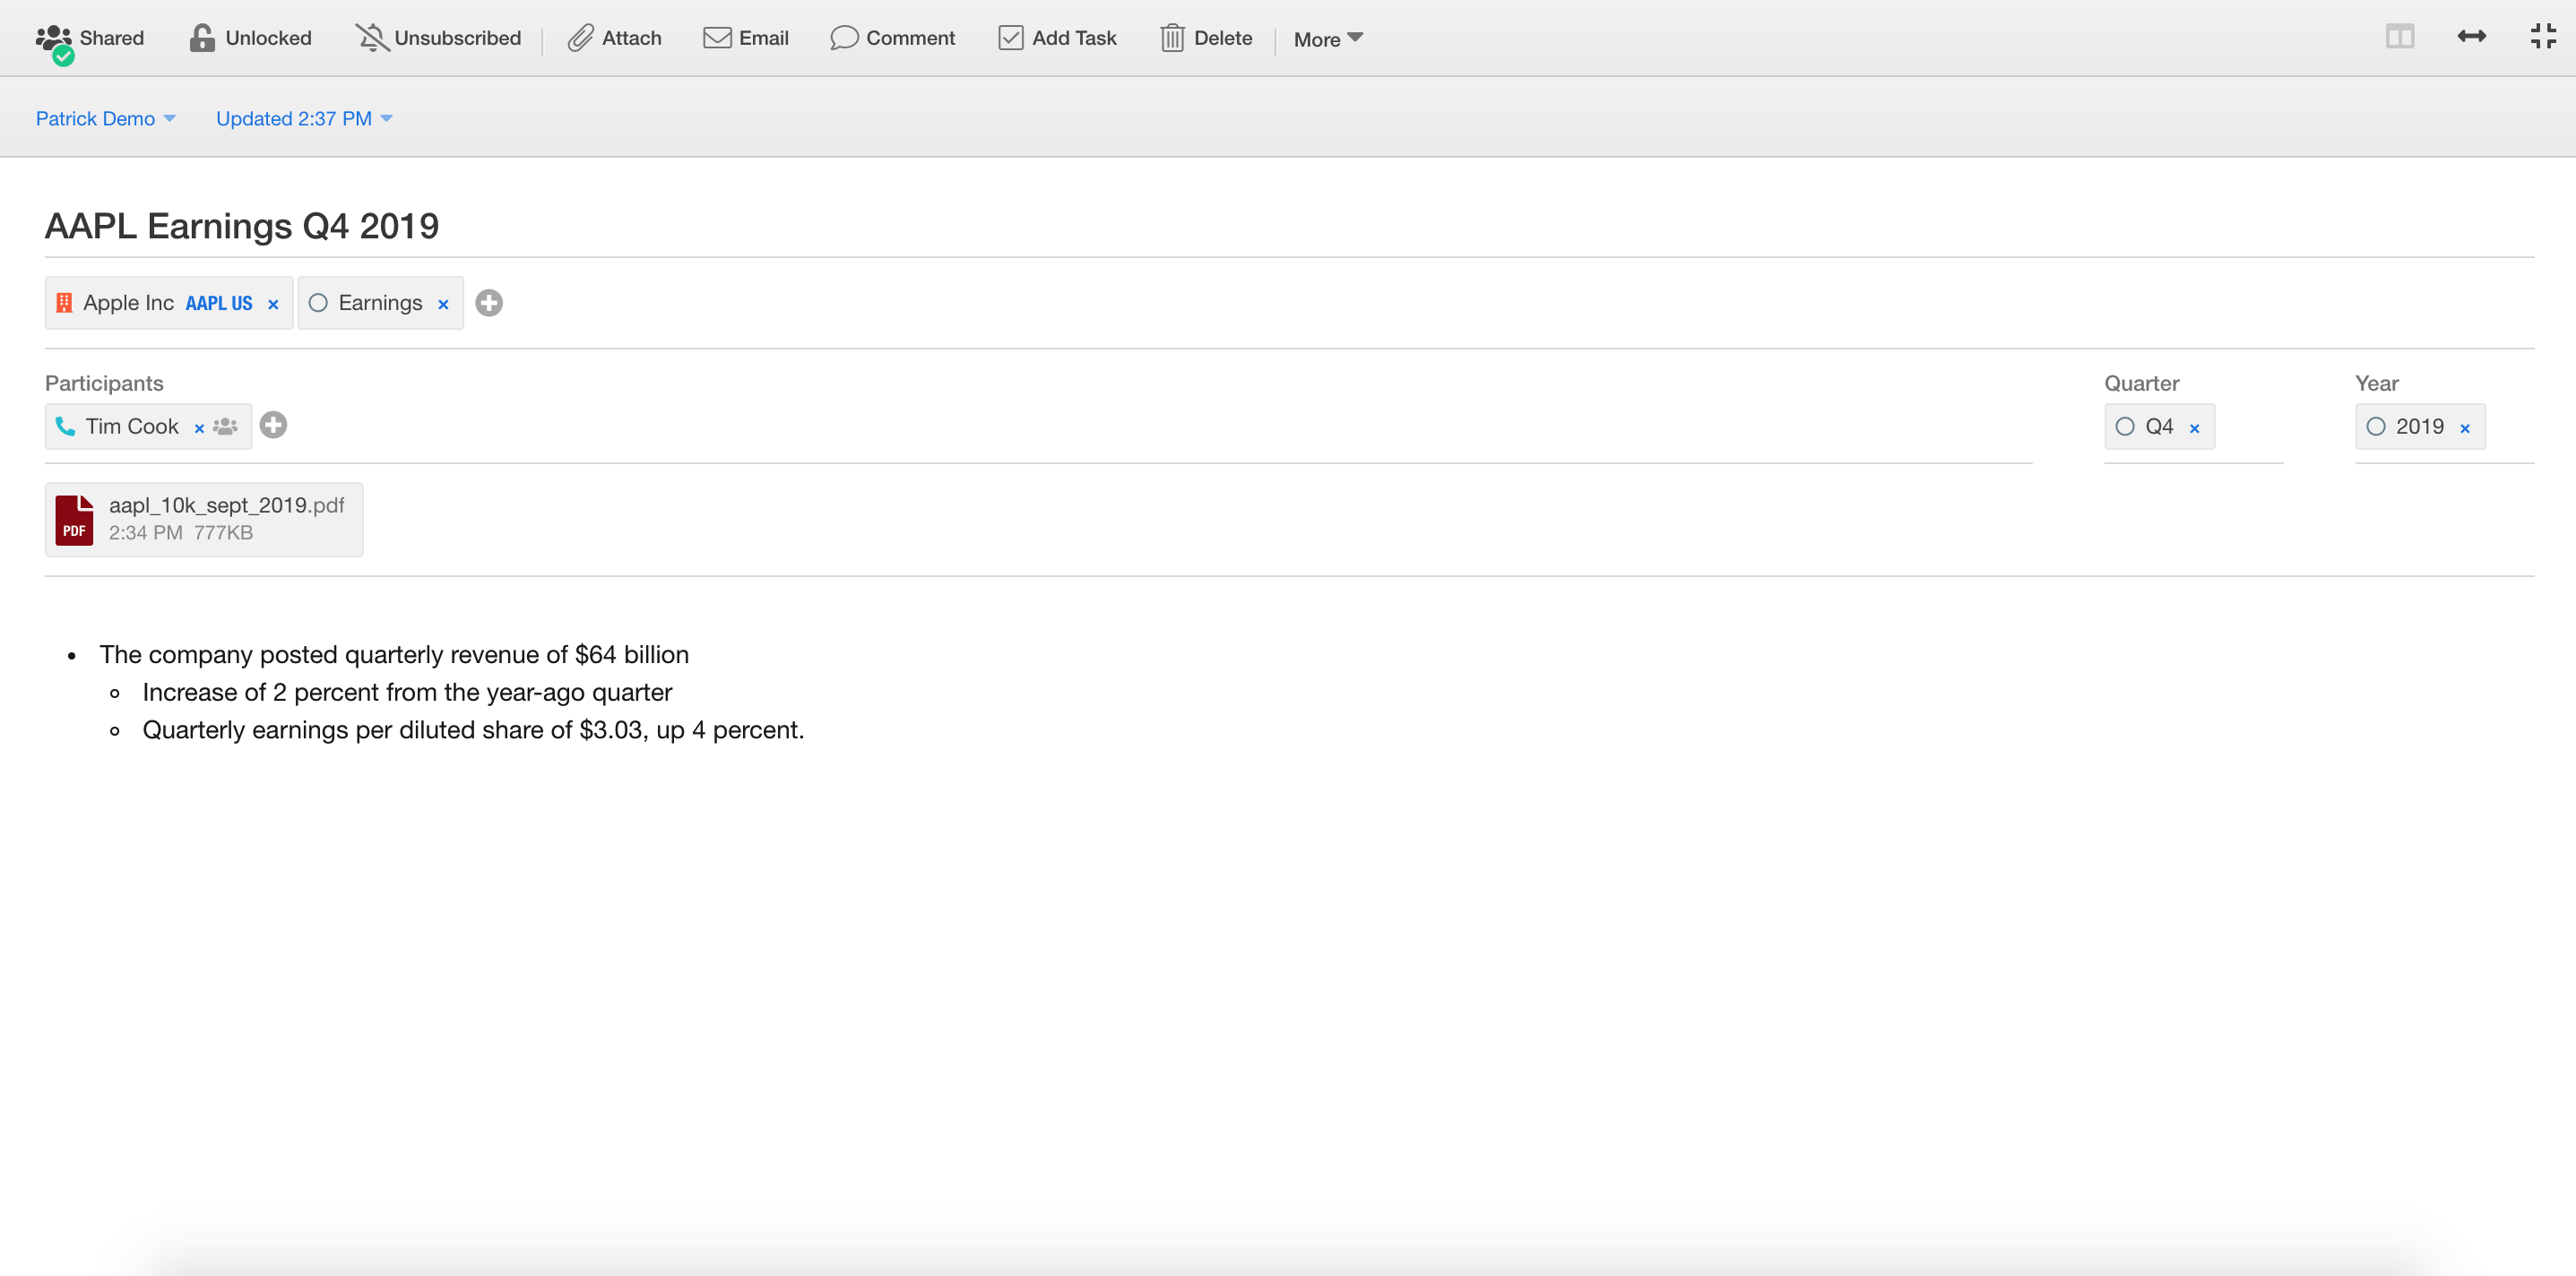
5.) To create a PDF of every note associated with a single tag, simply go to your chosen tag - company AAPL for example - and click the More option to 'Export Research to PDF'. Every note associated with that tag is automatically converted into a single PDF ready for print.

Web Clipper Extension
Use the Bipsync Web Clipper extension on Chrome or Firefox to get important news or other web pages automatically pushed and tagged into Bipsync with the click of a button.
1.) If you haven't already, download the Chrome extension or web clipper:
a. Via the Chrome Extension store:
https://chrome.google.com/webstore/detail/bolklfeganamejdcfaoigjpcmhkhpckm
b. Via Firefox and Safari
- Open the bookmark bar in your browser
- Open the Settings Menu within the Bipsync web app
- Click on the "Apps and Add-Ons" tab and drag the Web Clipper button to the bookmark bar.
2.) Once installed, you will see the Bipsync icon in your browser (Chrome) or a link within the bookmark bar (Firefox and Safari). Simply click on the bull/link to clip the article or web page you are on. Your article is clipped immediately and you can continue browsing.

3.) A pop-up box will appear immediately in the top right-hand corner of the browser, for you to select your Bipsync tags and sharing options, should you wish to do so.

4.) Your article will be available in Bipsync straight away, and shared/organized as per your selection.

Keyboard and Navigation Shortcuts
Use our fast keyboard shortcuts so that you can navigate Bipsync as efficiently as possible when operating with limited screen real estate.
You can also visit our full guide for the complete list of helpful keyboard shortcuts here: https://docs.bipsync.com/docs/web-app-keyboard-shortcuts
Note Editor Shortcuts
1.) There are a number of keyboard shortcuts available for the note editor as well as elsewhere. Try the below sample out for size:

Navigation Shortcuts and Hot Keys
1.) A number of hot key shortcuts will help you navigate the Bipsync interface without leaving your keyboard. The most common of which is the 'Go To' Launcher.

2.) To Activate the 'Go To' Launcher using Windows: Alt+G / Mac: Option + G on your keyboard to navigate to different contexts within Bipsync

3.) For example, to quickly get to the dashboard of CVS Health where you can find all notes tagged to CVS, use the Quick Launcher to seamlessly navigate there.

Emailing in Content
If you have an email that you received and want to forward that into Bipsync, you can do so by sending it to your assigned installation address.
Email Tagging
1.) When you add tags in [hard brackets] in the subject line, you'll be able to better organize and discover your content within Bipsync.
For example, in the screenshot below, the first tag have s will tag the Amazon company record. If you have specific note types configured in your installation, you can tag those as well. So if it's a [call] or [meeting], you can apply it as so.

2.) By adding the + symbol before the context (whether it be a contact, company, or a tag specific to your firm), it'll create a new record in the system.
In the previous screenshot, the last two tags are for records that currently do not exist in the system.
3.) When the email is captured in Bipsync, you'll see that the tags have been stripped from the title of the note and have been applied to the omnifield.

Updated 11 months ago