
Getting Started with Bipsync MCP
Prerequisites
- Bipsync Pro or Enterprise plan
- Your Bipsync MCP URL (contact your account team)
- A Bipsync account with valid credentials
Individual Setup (No IT Required)
Claude — Free, Pro, and Max
- Open claude.ai (web, desktop, or mobile app)
- Click your profile picture → Settings
- Select Connectors in the left menu
- Click + → Add custom connector
- Enter your Bipsync MCP server URL (case sensitive, ensure that the URL is all lowercase):
https://mcp.bipsync.com/{your-client-name}/mcp - Complete the OAuth sign-in to authorize access
- In any conversation, click + → Connectors → toggle Bipsync on
Note: Free plan users are limited to one custom connector. Pro and Max have unlimited connectors.
ChatGPT — Plus and Pro
- Open chatgpt.com in your browser
- Click your profile → Settings
- Go to Apps & Connectors → Advanced Settings
- Toggle Developer Mode on
- Click Add custom connector
- Enter a name (e.g. "Bipsync") and your MCP server URL
- Complete the OAuth flow in the popup
- In a new conversation, click + → Developer Mode → select Bipsync
Important: Plus and Pro users are limited to read/search only — write actions (creating notes) require a Business or Enterprise plan. Developer Mode is web-only (not available in desktop or mobile apps).
Microsoft Copilot (Consumer Plan)
No self-serve path is available for individual users on consumer Copilot plan. Use Claude Pro or ChatGPT Plus instead.
Enterprise Setup (Admin-Managed)
Claude — Team and Enterprise
Who: Organization Owner or Primary Owner
- Go to claude.ai → Organization Settings → Connectors
- Add the Bipsync MCP server URL
- Done — all organization members can now self-enable the connector per conversation
End-user experience: Users click + → Connectors → find Bipsync → click Connect → complete one-time OAuth sign-in.
ChatGPT — Business and Enterprise
Who: Workspace Admin or Owner
- Workspace Settings → Permissions & Roles → Connected Data → toggle Developer Mode on
- Add the Bipsync MCP URL and save
- Test the connection in Developer Mode
- Workspace Settings → Apps → Drafts → Publish
End-user experience: Users see Bipsync in their approved apps list and connect within a conversation.
Note: RBAC controls allow admins to restrict access by user group or role.
Microsoft 365 Copilot — via Copilot Studio
Who: IT admin / developer with Copilot Studio access
- In Copilot Studio, create a new agent with Generative Orchestration enabled
- Tools → Add a tool → Model Context Protocol → enter the Bipsync server URL
- Configure OAuth 2.0 authentication (contact Bipsync account team for setup)
- Enable individual Bipsync tools (all are off by default)
- Publish the agent via M365 Admin Center and scope to relevant user groups
End-user experience: Agent appears in the M365 Agent Store for approved users.
Note: This is a build-and-deploy engagement, not a configuration task. Contact your Bipsync account team to discuss.
Configure MCP Steering (Setup App)
Who: Bipsync administrators with Setup App access
Steering lets administrators guide how AI assistants interact with your Bipsync data across every connected client.
-
Open the Bipsync Setup App
-
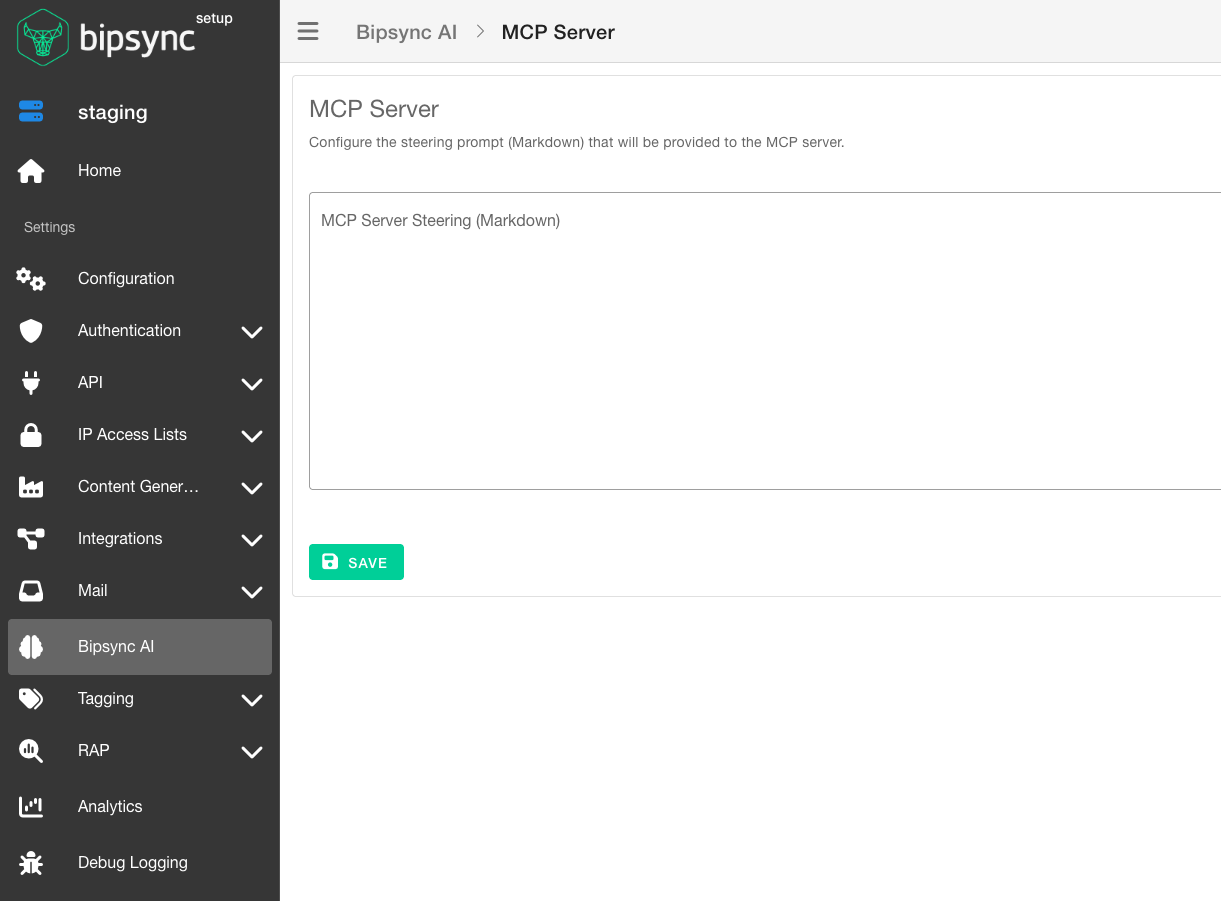
Go to the Bipsync AI section and open the MCP steering configuration
-
Edit the steering document to reflect your conventions and preferences
-
Save — changes apply to all MCP clients connected to your Bipsync server
Updated 26 days ago